
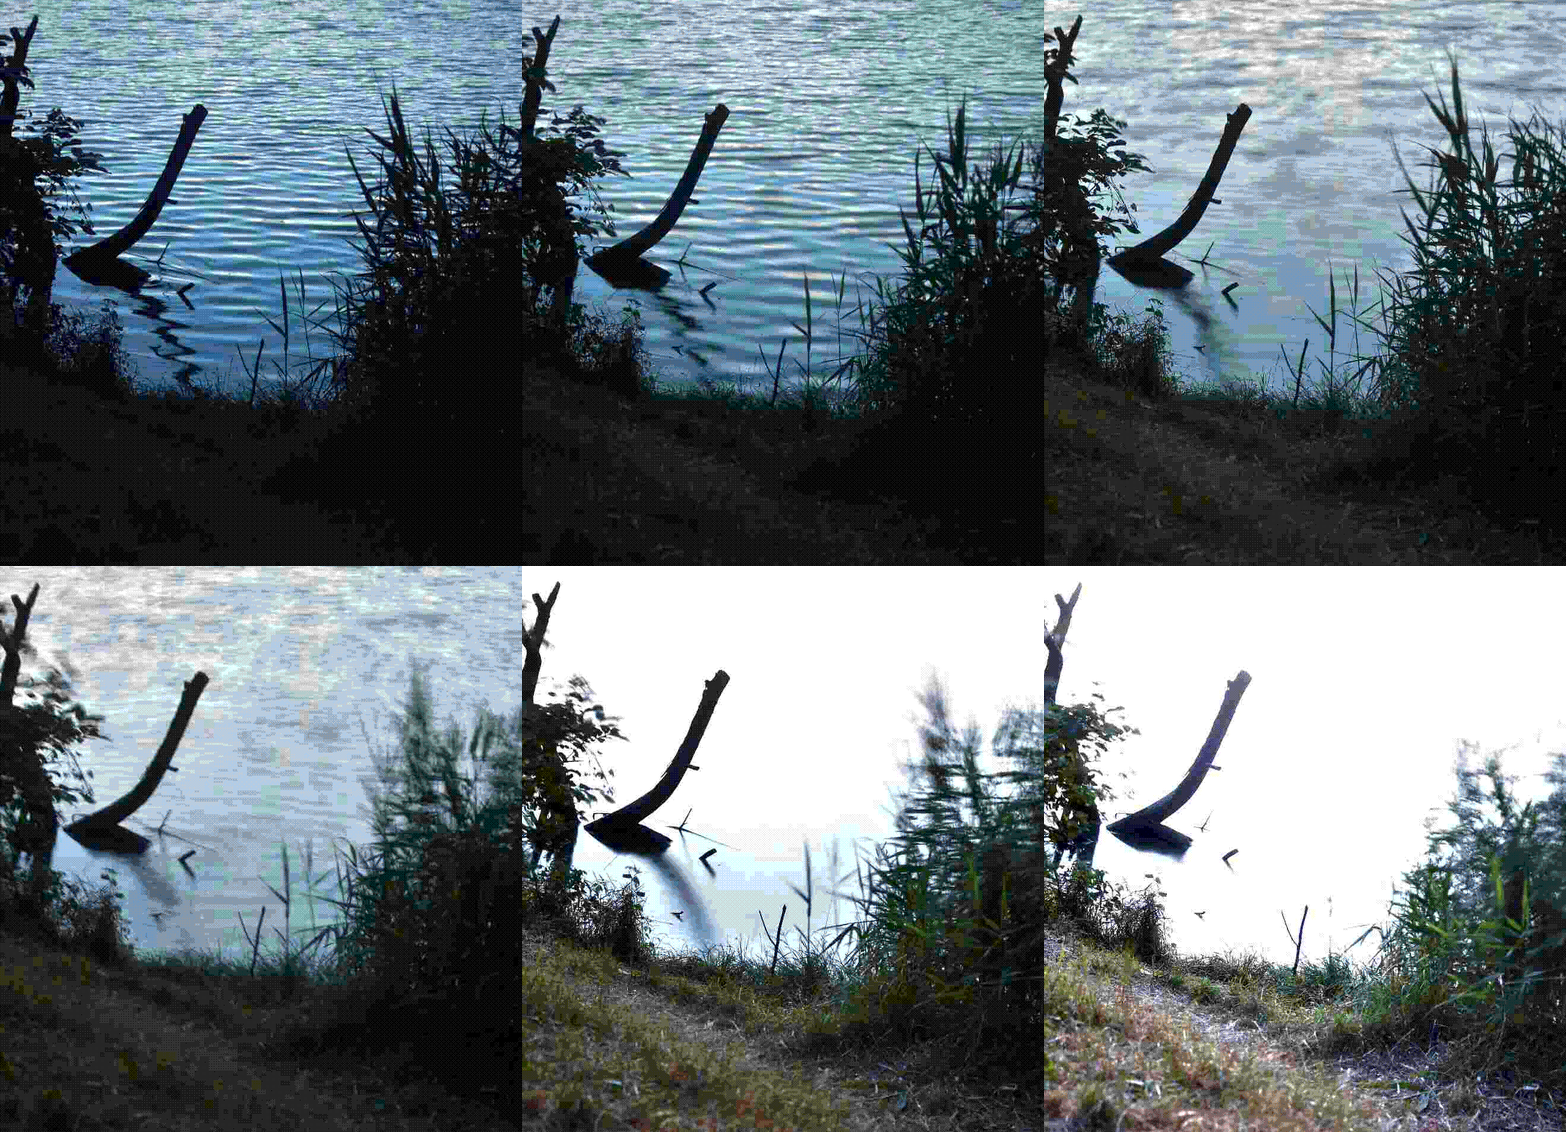
Short description
Long exposure is the technique through which, by having the shutter open for longer, the sensor gathers more light from a given scene. It's commonly used when shooting static scenes during the night. It can also be used during the day, but you need a way to block most of the incoming light (ND filters and/or high aperture).
Given example
Figure 1 shows how increasing the exposure time makes the image brighter (ISO is fixed at 100 and aperture at f/1.8). The scene was shot just after sunset, so it was fairly dark outside. At 30s the water is over exposed and that highlight information is also unrecoverable. Likewise at 1/15s the shadows are under exposed and we lose their information as well.
Required setup
Unless you have extremely steady hands, you're unlikely to shoot a clear picture in the integer seconds ranges (I think my best was a 1/4s). Most of the time you will need a sturdy surface. Figure 1 was shot using a tripod, but if you don't have one, a bench, the ground, a rock, even just propping yourself and the camera against a sturdy vertical structure can give you more range than freehand shooting (e.g. a wall, a tree, signpost, window, etc.). I advise to set your camera to shoot after a time delay, or use a remote if you have that on hand, as even the act of pressing the button can introduce vibrations or unintended movement.
Facts to keep in mind
Shooting with long exposure is a guaranteed way to get more light as long as there is any light, however since the shutter is open for a longer period, any motion will also be captured. as seen in Figure 1 the waves start to dissapear, the bushes look blurry, all motion gets muddy.
This can be the desired effect, such as shooting the night sky and visualising the star trails, or taking photographs of cars to emphasize their speed. As mentioned before, you need to limit the light that your camera receives, otherwise you are overexposing and losing information.
Examples
Here is a side by side example of long exposure, which are photographs of a better resolution than those in the Figure 1.

|

|
|---|